5 Killer Quora Answers On French Door Services
작성자 정보
- Lilliana 작성
- 작성일
본문
A Comprehensive Guide to French Door Services
French doors use a perfect mix of beauty and performance, providing a perfect transition in between indoor and outdoor areas. Understood for their vast paneled glass designs, these doors not just enhance aesthetics but also allow an abundance of natural light into homes. As the demand for stylish and energy-efficient alternatives increases, French door services have become important for house owners looking to upgrade or keep their doors. This article dives deep into the numerous aspects of French door services, consisting of installation, repair, maintenance, and the advantages they offer.
Understanding French Doors
What are French Doors?
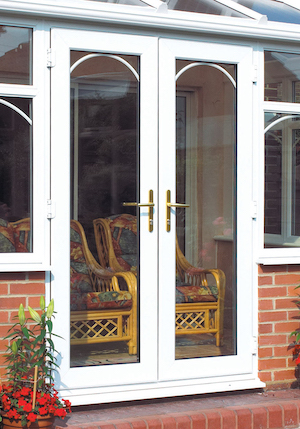
French doors are hinged Double French Door Repairs doors that usually feature several glass panels. They can be set up in interior spaces to different rooms or as exterior doors leading to outdoor patios and gardens. The classic style of French doors not just adds a touch of sophistication however likewise promotes open living by developing a smooth transition in between areas.
Benefits of French Doors
- Natural Light: French doors are primarily made from glass, allowing maximum sunshine into your home.
- Aesthetic Appeal: Their traditional style matches both contemporary and traditional settings, improving curb appeal.
- Flexibility: They can be utilized in various applications, consisting of as patio doors, space dividers, or entryway doors.
- Energy Efficiency: With advances in glass technology, contemporary French doors can use exceptional insulation, lowering energy costs.
Table of French Door Services
| Service Type | Description | Benefits |
|---|---|---|
| Installation | Professional setup of new French doors | Makes sure resilience and proper fit |
| Repair | Fixing damaged frames, locks, or glass panels | Extends the life of existing doors |
| Maintenance | Routine assessments and maintenance, including sealing | Prevents future issues and damages |
| Personalization | Customizing design, size, and ends up to match home decoration | Customizes your space |
| Upgrades | Installing energy-efficient models or clever technology | Enhances efficiency and functionality |
French Door Installation
Choosing the Right French Doors
When it pertains to installing French doors, selecting the best design and material is essential. Here are some elements to consider:
- Material: Common products include wood, vinyl, and fiberglass. Each material has its own benefits, from visual appeal to maintenance needs.
- Size: French doors come in different sizes. Procedure your space properly to guarantee a perfect fit.
- Style: Consider the architectural style of your home. Conventional, contemporary, or rustic-- there's a style for every choice.
The Installation Process
- Preparation: Clear the location where the doors will be installed and guarantee you have all essential tools and materials.
- Get Rid Of Existing Doors: If replacing old doors, carefully remove them from their hinges.
- Frame Inspection: Check the door frame for any damage. Repair it if required to provide a stable structure for the brand-new doors.
- Putting Up New Doors: Position the doors in the frame, ensuring they swing correctly and seal tightly.
- Last Adjustments: Secure the doors in location and ensure that hardware such as locks and handles are set up correctly.
French Door Repair and Maintenance
Even the very best French doors may need periodic repairs and maintenance. Comprehending common issues is key to preserving their functionality.
Common Repair Issues
- Damaged Weather Stripping: Essential for insulation, worn strips can result in air leaks.
- Broken Glass Panels: Accidents can happen, and broken glass needs instant attention for security and effectiveness.
- Hinge Problems: Rusty or damaged hinges can prevent doors from opening or closing efficiently.
Maintenance Tips
- Routine Inspections: Check for signs of wear, damage, or air leaks.
- Cleaning: Use non-abrasive cleaners to maintain the glass and frames. Routine cleaning helps maximize natural light.
- Lubrication: Apply lube to hinges and sliding systems to guarantee smooth operation.
- Sealing: Ensure seals stay undamaged and replace them if you notice gaps.
Personalization and Upgrades
For homeowners wanting to improve their French doors even more, personalization and upgrades are excellent options. Here's what you can explore:
Customization Options
- Frame Finishes: Choose different paint or stain finishes to match your home's interior or exterior.
- Ornamental Glass: Opt for engraved, frosted, or tinted glass for added personal privacy and design.
- Included Features: Incorporating built-in blinds or screens can improve functionality and aesthetic appeals.
Energy-Efficient Upgrades
Considering an upgrade to energy-efficient designs can considerably minimize heating and cooling costs. Try to find doors with:
- Low-E Glass: This special finishing shows heat, keeping homes cooler in summertime and warmer in winter.
- Multi-Point Locking Systems: These systems improve security and enhance energy performance by guaranteeing a tighter seal.
Frequently Asked Questions (FAQ)
Q1: How long does it take to set up French doors?
A: The installation process usually takes a few hours to a day, depending on the complexity of the installation and whether any structural adjustments are required.
Q2: Do I need to work with a professional for installation?
A: While DIY installation is possible, employing a professional makes sure appropriate fitting and minimizes the threat of future issues.
Q3: What maintenance do French doors require?
A: Regular cleansing, regular examinations, and regular lubrication of hinges are important for keeping performance and look.
Q4: Can I install French doors in winter?
A: Yes, as long as the installation is done carefully, it is possible to install French doors in winter. Nevertheless, outdoor conditions ought to be considered to reduce issues.
Q5: Are French doors energy-efficient?
A: Modern French doors designed with insulated glass and appropriate sealing can be extremely energy-efficient, helping to reduce energy costs.
In conclusion, French doors serve as a spectacular feature in any home, offering not just visual appeal however also useful benefits such as increased natural light and a seamless flow between spaces. Understanding the services readily available, including installation, repair, maintenance, modification, and upgrades, can make it possible for property owners to take full advantage of the advantages of their French doors. Whether you're wanting to install a new set or keep an existing one, professional French Door Installation door services can help make sure that these lovely doors stand the test of time while improving your living area.
관련자료
-
이전
-
다음